Thursday, January 13, 2011

Paisley flower pin

I was traveling for the first part of January. On Sunday, I carpooled back from New Orleans, so I was in the car (thankfully not driving) for six hours. When I got home, after eating a refreshing salad of course, I wanted to do something creative. I had bought a pattern set for a bunch of different flowers that could accessorize garments or hair. I decided to make one of those. It was quite easy (although the pattern wasn't well written, which is too bad because it's the kind of project that probably attracts a lot of people who aren't experienced at sewing, and one of the diagrams was incorrect). I used this olive paisley fabric that had been made into an apron for a friend and a couple of turtle bibs. This project took up probably the last usable scraps. I don't know that I have anything wider than 3 inches left. I also used a button from this big bag of buttons my mom gave me a couple months ago.
Probably the hardest part of the project was deciding what color button to use for the center. I liked the big contrast a purple or red button gave, and I have a ton of white pearlescent buttons that looked pretty good, but the gold one really worked well. After making the flower, I turned it into a pin by shoving a pin backing into one of the back layers of petals. It's not the most elegant or most secure way to do it, but it was easy, and since there won't be a lot of tension or stress on the pin, it should hold fine. I think the pin will look good with a lot of different shirts I have. I tested it with various colors of sweater, and I think it will look really awesome with a bright pink or orange tank top in the summer. I got quite a few compliments when I wore it on Monday. I think these will also be easy but fun gifts to make for people.

Monday, January 3, 2011

Flashback dress


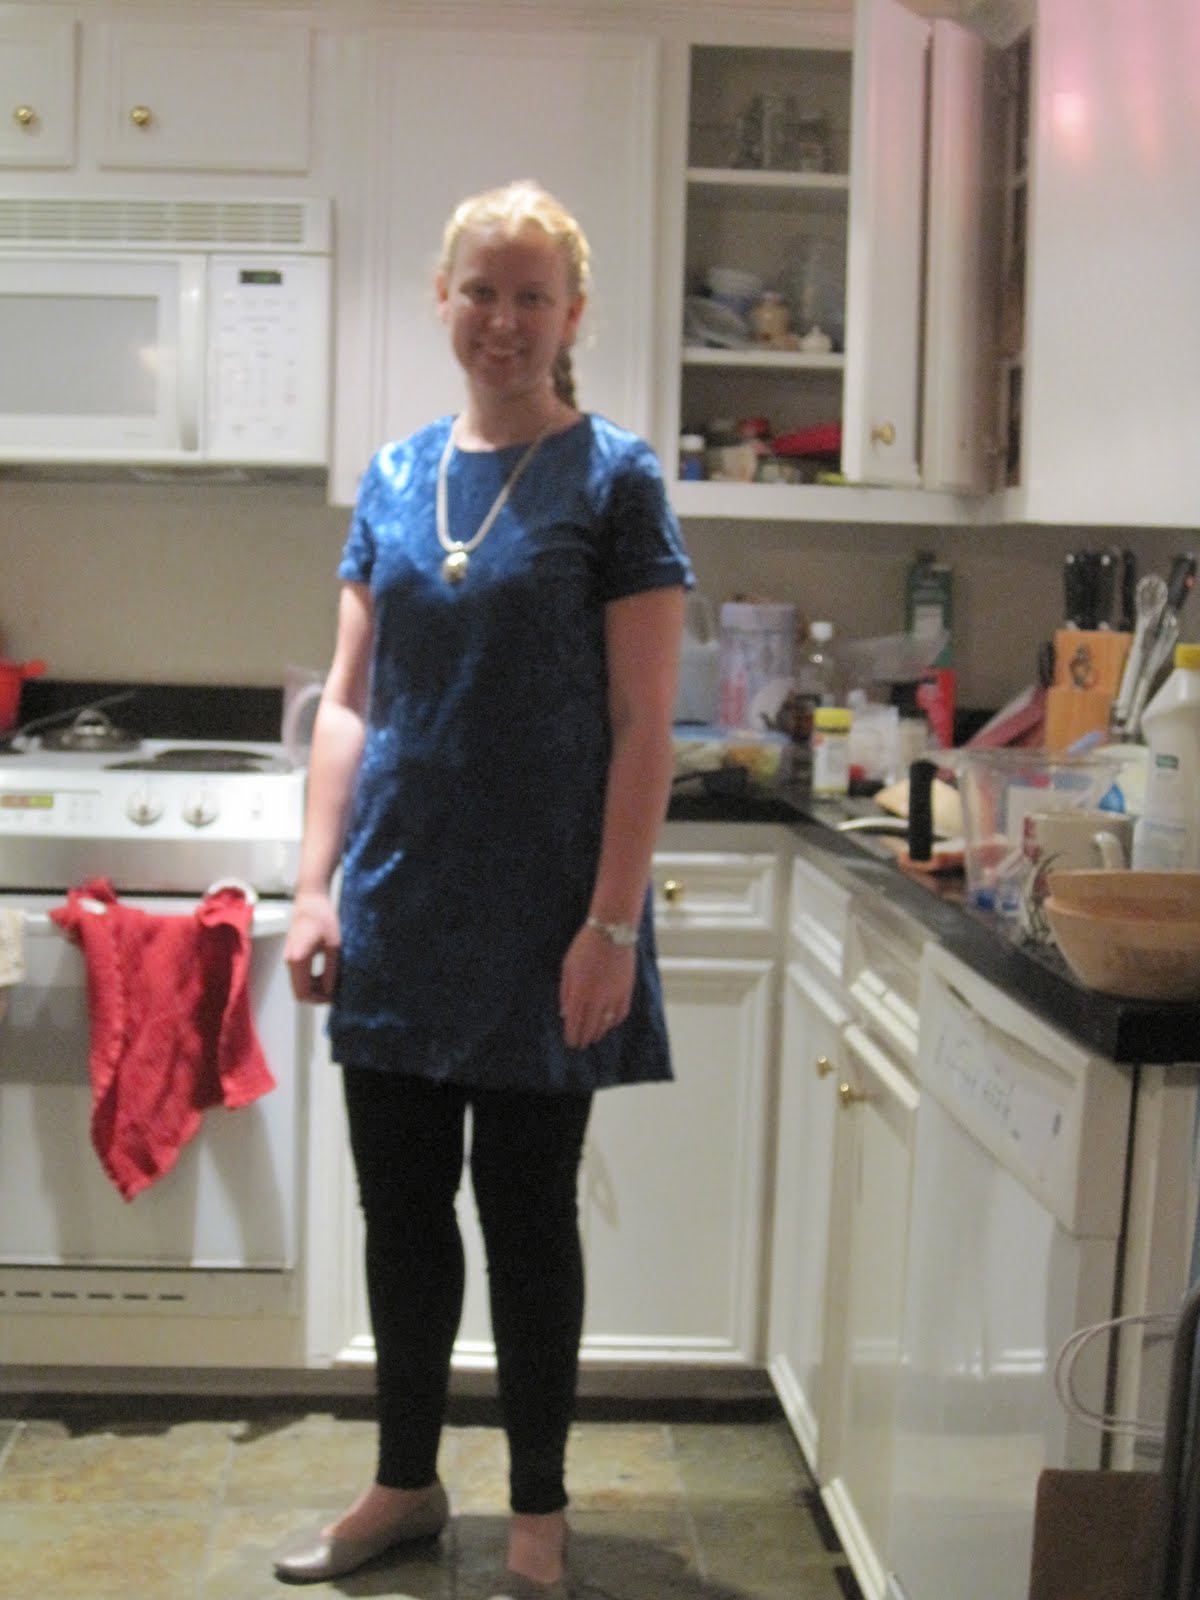
I don't know when I made this dress. 1998 sounds about right. It's definitely from an earlier era in my sewing, but about a year ago I rediscovered it when looking through a closet at my parents' house. I don't think I ever wore it much. It's a little too short for my taste (more so now than then), the neckline doesn't lie quite right on the left side (maybe hard to tell in these photos-we didn't take the time to take any good ones), crushed velvet is never really in style (or is it? I don't know these things), and it has almost no shaping in the torso, making it not ideal for a somewhat curvy lady like me. But despite those flaws, I liked it enough to keep it, and I actually wore it to dinner last week. I had just bought my first pair of leggings in preparation for my trip to Chicago, and I decided that the dress with the leggings would be modest enough. I also wore some new gray-beige shoes and an old-ish necklace. This is definitely not how I normally dress, but I thought it was a really fun, funky outfit. And I think the leggings also make it modest enough to ride a bike in, so I could even wear it to school!
By the way, I've never had leggings before, but I think these really make my legs look muscular. I'm going to have to keep that in mind.

Thursday, December 30, 2010

More placemats

I've been busy with the reverse applique! For X-mas, I made my sister and brother-in-law a set of placemats with purple stencils and my parents a set with both purple and turquoise. I used the same stencils as when I made them before. The purple fabric was leftover from the bridesmaids dresses at Rachel's wedding, and the ivory satin-esque fabric is reminiscent of her wedding dress, so I thought that would be appropriate for them. For my parents, I used that purple fabric and the turquoise I had used for my wedding dress so they would be wedding-themed too. (The color looks pretty bad in the left picture above. I had the yellow fabric and for some reason thought that would be a nice backdrop for the napkins. Trust me that they were a good color.)

I made the set for my sister first. I used the exact same technique I used the first time I made placemats. I was not pleased, however, with how puckered they were. I thought that maybe eliminating the step where I sewed the middle layer to the bottom layer would help. I decided to try one of those spray adhesives, and it really seemed to do the trick. As you can see, the set for Mom and Dad is a lot less puckered. It also shaved a few minutes off the time for each placemat because it's quicker to spray than to sew. I am normally resistant to steps like this- they seem like cheating, but the results were really good. Now here are the fronts and backs of the stencils done in the new style. They definitely look cleaner, although I still like the way the backs look on the other ones.

My biggest disappointment with this batch is that the outer layer is thin enough that the middle layer shows through pretty badly. I don't know if it's possible to avoid that with a light outer layer. I do have plans for a set with black as the outer color.
I think everyone liked the gifts. Yay! I had kind of been hoping to make sets for a lot of other relatives, but they're pretty time- and energy-intensive.

Sunday, December 26, 2010

Hyperbolic scarf

This is the first crochet project I attempted, and I've made it several times now. It's quite easy: chain a bunch, double crochet twice in each chain stitch, and then double crochet twice in each stitch on the next row. I like it because it's funky and mathematical. See, this is a great example of negative curvature, and as a hyperbolic geometer, I dig that. Here's a website where you can read a bit more about the mathematics of crochet. (The website is maintained by a math professor friend of mine who is using crochet to help get students excited about geometry. It's pretty cool! It also has some links to other websites about crochet and math.)

(Math digression in blue because I like blue.)
In case you're interested in the math, here's a little background. In 10th grade, you probably took a geometry class. In it, you learned about triangles and writing proofs using facts about how much total angle different shapes have in them and so on. Well, that was something called Euclidean geometry. In Euclidean geometry, the plane that you kind of base everything on is flat. One feature of Euclidean geometry is that parallel straight lines remain the same distance apart forever, and there is only one line parallel to a given line that goes through a given point. (This is called the parallel postulate.) Euclid thought that this was the only consistent geometry, but it turns out that there are consistent geometries in which your "plane" is not flat. In fact, all of them involve replacing the parallel postulate with a different axiom. One non-Euclidean geometry you are probably fairly familiar with is spherical geometry. Imagine that you are living on the surface of a sphere (not too hard, right?). That is called positive curvature. You can see the differences between positive and flat curvature most easily if you imagine a plane flight between points that are very far away from each other. The shortest distance between two points on the earth looks curved on a map. You'll also notice that any two of these curves, which are called great circles, will intersect. (For example, all the lines of longitude intersect in the poles.)

Well, hyperbolic geometry is the study of negative curvature. It's a bit harder to visualize than positive, but the way I think about it is that there is "extra surface area" for a given perimeter. "Parallel" (i.e. non-intersecting infinite) lines move away from each other. There are an infinite number of parallel lines between a line and a given point not on that line. One way to visualize a portion of the hyperbolic plane is to imagine a saddle. Some curves on it go up, and some go down. (In contrast, on a sphere, if you put two perpendicular lines on the north pole, they would both go down.) I find that sewing and crochet are really great media for displaying negative curvature because you can force your fabric to have "too much area" and pucker in a pretty way. That's what this scarf does by putting "too many" stitches into the second row (two stitches for every one stitch in the first row). The fabric has to twirl and buckle to make room for all those extra stitches. People who make hyperbolic crochet like to play with different increase ratios. 2:1 is a very steep increase. 6:5 is very pretty. To do that, you make six stitches in the second row for every five stitches in the first row. No matter what your increase ratio is, though, you will learn that exponential growth is very very fast!

Hyperbolic geometry is pretty neat. And you can be employed by it! People like me make a living studying spaces of hyperbolic surfaces.

OK, that was a long math digression. Back to the crochet. I like making this gift for people. Most recently, I sent a purple one to my MIL for her birthday. The green one above is mine, and the multicolored one I sent to one of my best friends for her birthday. It's easy enough that a crochet newbie like me can get the hang of it really quickly and whip one out in just a few hours.

Wednesday, November 24, 2010

Yellow shirt skirt

This is a little different from yesterday's shirt skirt because it's made from a t-shirt instead of a button-down shirt. It's much more casual, and I like to wear it to fun events like Houston's Art Car Parade. (That's where the above picture was taken.) I made this out of a t-shirt Jon had from college that said "Drop your pants BBQ." (Oh, college!) This is the first incarnation of the skirt.
As appealing as it was to have a bright yellow skirt that said "pants BBQ," I needed to figure out how to cover that up. I decided to use the sleeves to make a front pocket.
Much better. Once again, I made this long before I had a blog, but here's the general idea of how to make this. Aside from the shirt, you'll need some elastic that is as long as your waist measurement. I think 3/4" or 1" elastic would be a good size. I don't remember what size I used.

1) If you want a front pouch like mine, carefully remove the sleeves and set aside. Cut the neck off of the shirt from the top of one side of the sleeves to the top of the other.

2) Decide how long you want the skirt to be. Add about 2 inches. Measure that distance from the bottom of the shirt and cut the shirt off at the top. Sew side seams, following the curve of your body. The waist should be a little loose. You will be adding an elastic waistband.

3) Make casing for elastic. To do this, fold over 1 1/2" at the top and sew it down on the inside, leaving a 2" opening to insert the elastic. Make sure the casing is wide enough to accommodate the elastic comfortably.

4) Cut the elastic to your waist measurement plus three inches. Stick a safety pin through one end and use it to guide the elastic into the casing. When you've gotten it all the way around, overlap the elastic and sew it together. Then sew the opening of the casing shut.

5) Now is the time to add the pouch, if you want one. Sew the larger ends of the two sleeves together. Position pouch on skirt as desired. Sew top and bottom edges to skirt, taking care not to sew into the elastic.

This is just an outline, and if you don't have experience sewing, you might want to ask someone for help because I don't know if all the steps are completely clear.

Monday, November 22, 2010

Pink shirt skirt

This is a skirt I made out of one of Jon's old shirts. The sleeves were kind of worn, and it was too big for him, so I got his permission to refashion it. I have another one in progress that I kind of got stalled out on months ago, so hopefully it will grace the pages of this blog soon. I really like this skirt. It's a nice casual but kind of funky garment. I like that a lot of the details were already done for me: buttons, a hem, and a cute front pocket.

I made it well before I even considered having a sewing blog, so I didn't take step-by-step pictures of how to make it, but here's an outline of what I did.

1) Cut off neck/shoulder yoke area of button-down shirt. Cut off sleeves. (I was hoping to use the sleeves as pockets, but it was just too lumpy) Sew side seems down the two sides, following the curve of your body. You might have to take out some of the bottom hem and re-sew it after you do the side seam.

2) Add darts at the top. If you have a small waist-to-hip ratio, darts are quite helpful in getting skirts to fit right. To make darts, figure out how much of a decrease you need at the top, divide by four, and pinch that amount out in four places around the waistline. I made my darts about 2 1/2 inches long. It's not difficult, but it took me a couple tries to get them to look good.

3) Make the waist facing. You have some fabric lying around because you cut the sleeves and shoulder part off. The shoulder/neck area is probably the best place to find your facing. What you want is a strip of fabric (it might be in a few pieces) about 2 inches wide and as long as the top of the skirt. With right sides together, sew this strip to the top of the skirt with about a 5/8-inch seam allowance. Clip curves, fold facing to inside, and press. Topstitch close to the top of the skirt. This will help the facing stay folded down.
I had to do a little futzing with the facing near the buttonhole. I didn't feel like being very "correct" about it, so this is what the inside of the fabric looks like. (The zigzag stitching was my way of making sure the facing wouldn't fray.)
4) Try it on. You should be doing this as you go along anyway. Here is what the skirt looked like for me at that point.
I wore it a few times like that, and I liked it, but I finally had to make a few changes. The top buttonhole had gotten a little distorted in the lining futzing stage, so the top button kept coming out. That was no good, so I got a larger button in a similar pattern and replaced it. Also, I was having gaping problems with the top few buttons, so I added snaps between them. I feel much more secure now.
I hope to be posting another skirt shirt sometime soon. I still have most of the sleeves of this shirt. I have been using this fabric for the cheeks of the bumblebee baby bibs from the last post. I think the pig ears were made out of this too.

Thursday, November 4, 2010

Bibs!

I have hit the age where all my friends are having kids. I wanted something practical but personal to give to my expecting friends, and I came upon Simplicity pattern 2468. It has several animal-themed bib ideas and patterns. There are three basic shapes that can be made into the animals they suggest, or you can get creative with them. They take a bit of time to make for how small they are, but I think that's to be expected becase they have a lot of little details. I think they are super-cute. After I made the first batch, I was trying to figure out a reason to keep them for myself, but they really don't coordinate with any of my outfits.

I gave the first set to friends in May, and I've three more sets in the past couple months because I have three friends due in November and December. I made five for the first family: a bear, a turtle, an alligator, a plain one with aliens on it, and the one I thought might kind of look like a fish. It turned out pretty weird, but I thought it would still be useful as a bib, so I gave it to them anyway. Here is the first batch.
I think the bear and turtle ones are the cutest, but the alien print is pretty great, too.

The next set I made were teddy bear, turtle, blue flowers, monkey on surfboard print, and one that I was trying to make look like a pig, but it kind of looks generically mammal. I get hints of dog. The monkey surfboard print is a remnant I bought at JoAnn's ages ago, and then when we went to have our friend's shower, we couldn't decide between a monkey theme or a beach theme, so we went with both, and the bib fit perfectly with that. Funny how that can happen.
The next two sets were pretty similar. I made the bee for the first time, and I thought it ended up really cute. Here are the other sets of bibs.
I really love making these bibs for people. I have bought some fabric for them, but mostly I am using leftovers from other things I've made. The turtle body and teddy bear ears are from aprons I've made for friends. The pig ears and bee cheeks are from an old shirt of Jon's that I've made into a skirt (more on that later). The blue flower print is from one of my perfect dresses. Most of the buttons are from my and my mom's button stashes. I've probably spent more on ribbon than on fabric for these crafts. If you are having a kid soon, there's a good chance you'll be getting a few of these. I hope you like them.